Tuesday, September 4, 2012

Another Gallery Wall Switcheroo

I've totally been meaning to change up and expand the family picture gallery corner in our family room.  Most of the pictures were mine from my previous (single) apartment living and I felt pretty bad about that!  The arrangement wasn't so hot, and the one wall just looked terrible thanks to the hubs grabbing a few nails (and a screw- I pulled it out of the wall today, that's a new one!) and haphazardly throwing some pics up on the wall one Saturday.  This is why he's not allowed to do unsupervised decorating.  LOL.

Painting the room was the perfect excuse to get started, along with a bunch of new frames I'd gotten for Christmas (last year!!).  There was also a frame that was brown, and I was going for all black frames, and white mats.  So I painted out the brown frame, changed up a few of the mats, and then added some new frames and switched up the arrangement.  Now don't be alarmed, there are a number of the frames that are still empty or sporting the generic pics that come with the frame, but I can only do one project at a time!!  Next up is printing out some more recent pics of the hubs & I and our families, and popping them in the frames.  But at least I've got a new arrangement going!

Here's the before:


And the after:


 So what do you think?  Much better, right?  And I only put a couple extra nail holes in the walls to get to that arrangement!!


Monday, September 3, 2012

A Tutorial: DIY Mosquito Repellent

Admittedly, I'm a little late in the season on this homemade bug spray- we've all been getting eaten alive for months now!  I've been meaning to try making my own spray after a friend told me she made some herself, and since we're planning to hold babygirl's first birthday party outside, I figured this was a great excuse to get on the ball!

I was in the neighborhood of a great little natural food store last week, so I decided to pick up a few essential oils for the spray.  I read about a million recipes online, and they all differ a little bit, but Citronella oil & Lemongrass oil seemed to be mainstays in lots of the recipes, so I went with them.  Peppermint & Lavender also showed up frequently, but peppermint came with warnings that it could burn the eyes, and with a little one planning to use it, I didn't want to take the chance.  Lavender seemed to be used mainly for its scent, and since I LOVE the smell of lemongrass, I decided to leave off the lavender.


Next up is witch hazel.  You can find it near the alcohol & peroxide at drug stores & grocery stores, and it's fairly cheap (the oils on the other hand, aren't!).  I picked up 2 bottles of the witch hazel & two spray bottles so I'd have lots of the bug spray.  If it works, I can see us using it all the time, and for a while it will just be at the cost of a bottle of witch hazel since the essential oils should last quite a while.

Now for the recipe.  I just synthesized a bunch of recipes I read online, so this isn't tried & true yet.  I'll get back to you on the results, or any changes I'd make.

Made in a 22 oz spray bottle:
1- 16 oz bottle of with hazel
3ish oz of boiled (and cooled) water (just to fill the bottle a bit more)
25 drops of citronella essential oil
25 drops of lemongrass essential oil


Add all ingredients to the spray bottle and shake well to mix, and then spray to keep the mosquitoes away!!   Be careful about spraying near your face- probably better to spray a bit on your hands and then dab on your face avoiding your mouth, nose & eyes.

I'm really hopeful this will work on the three of us, and I'm pretty sure we'll have occasion to test it when we do some yard work.  Our yard is terrible about bugs, and they seem to LOVE all three of us!!

*Update, the hubs is the only one to test the spray thus far, and he thought the bugs were still eating him alive.  Hmmm, not encouraging, but I want to test it myself before I make changes or give up on it!!

**Update, the whole family used the bug spray today while we worked out in the yard (well, babygirl supervised our work from her highchair) and I'm happy to report there was nary a bug bite!!!  It was my first time using the bug spray and I was pleased- the initial spray is very cooling and has a clean refreshing smell.  I just sprayed on my arms and legs and then rubbed it in a bit.  It dried fast and smelled great, but not overwhelming (and I noticed the smell faded, as in, you didn't feel like you were a walking lemongrass/citronella plant).  I then sprayed on my hands and rubbed onto babygirl's arms & legs.  The hubs got a spray down as well.  Mosquitoes and other little flying annoyances usually tear us up in the yard, but I didn't notice any at all (I did notice a giant black widow when I picked up a rock from the mulch, how the heck do you get rid of those damn things?!?).  We're going to try it out again tomorrow night when we have our neighborhood meeting in the park, so I'll see how it works again, but for now, I am a happy mama!!

Sunday, September 2, 2012

Weekend Update

I thought about saving this for tomorrow evening, since it's a 3-day weekend, but then decided what the heck, I'll post Sunday night as usual!

This has been another low-key weekend, getting things done around the house, and relaxing along the way.  I continued our painting from last weekend, and have pretty much finished up the downstairs (pics to come this week, promise!).  The hubs worked out in the yard, and babygirl did lots of driving around the house in her pink Jeep walker, "reading" the newspaper, and playing with an early birthday present- a stuffed dog that talks and moves its ears- she's obsessed!!  We also watched lots of college football on Saturday, and since babygirl had some practice cheering on Thursday when we went to the GSU game, she was very good at clapping and yelling, now we just need to work on her timing!

Of course I also worked on some house projects, including a homemade bug spray, tutorial to come.


I did a little shopping at one of my favorite fabric stores- I could spend ALL DAY in there, and am thinking about going back tomorrow!!  I saw a remnant that I debated getting for pillows, and now I can't get it out of my head!!  I adore that multi-colored chevron and wish it wasn't so heavy, or I'd snap it up to make a dress for babygirl.


I discovered a little nook I'd never seen before with all sorts of colorful ric-rac and trims.  Heaven!


While I was there I picked up a little remnant to work on a gift for a friend (so I'm only showing the teeniest sneak peek!) and this sample fabric "book" that was free!  I love their free bins, sometimes they have the coolest stuff.  I picked this up because these sample "pages" are the perfect size to make oatmeal container headband holders.  So excited!


I also made a stop at Goodwill and a few other shops and have supplies for some crafty ventures.  Can't wait to get started!  Actually, I couldn't wait, and have already gotten started, lol.  Pics & posts to come this week!
 

Happy Labor Day to everyone!!  We have tickets to the Braves game tomorrow afternoon- babygirl's first baseball game!  Just hoping the weather holds up and it's not too hot.  Maybe swimming tomorrow afternoon and grilling out, and of course I always try to squeeze in projects.  My kind of weekend!

Friday, August 31, 2012

A Tutorial: Hanging a Pendant Shade


A year or so ago I bought this awesome drum shade at an antique shop.  At the time, I thought it would make for a great swap in our breakfast room, for the boring ceiling mounted fixture that was already there.  What I didn't realize at the time is that the metal framing inside the shade isn't standard and made it really tough to figure out how to hang it.  We took down the ceiling mounted fixture, but I just couldn't figure out how to hang the shade.  So the old fixture went back up, and the shade went on top of the dryer in the laundry room.

Fast forward to the present, and I got sick of looking at the awesome shade just sitting on top of the dryer!  I knew I could figure out how to hang the shade if I really thought about it.  So I dug out a round metal plate I'd be saving to use for the project, and I knew I could make it work if I could find a hard-wire light kit where the wires could fit through the hole in the plate.  I lucked up this week at Ikea when I saw this on clearance:


A hard-wire pendant light for $6.  The light was totally sealed so I had no idea if it would work, but the price was great so I decided to go for it.  With some work, we were able to totally take the light apart to remove the pendant and string the wiring through the round plate- success!!  And this is where things got a little sticky.  You see, we did all that on Tuesday, and I was basically DYING to hang that darn thing from the moment I saw the pendant at Ikea.  But the hubs, well, he doesn't share my same enthusiasm for DIY.  Especially when it involves electrical.  I don't want that to scare anyone away though, because it couldn't be easier.  You just have to take precautions.  Or in my husband's case, turn off all power to the house, LOL.  So after a lot of persuasion, and some loud voices, we got started.

Here is what it looked like before:


Then we turned off all the power and removed the fixture.  Just remove the shade, then un-do the wire nuts and separate the white, black and ground wires.  Then, attach the new fixture by twisting together the like colored wires, and securing with a wire nut.  This takes all of a few moments.  Then, secure the ceiling plate to the ceiling.  And here's what it looked like that that point:


Here's a close-up of that round metal plate that made it possible to hang the shade.  Notice how it's slightly larger than the metal framing on the shade?  It worked perfect!


Then it was a matter of pulling up the extra cord until it was the height we wanted.  I didn't do anything exact, just eyeballed it.  And here it is in place:


I am LOVING the look!!  It subtly adds so much to the look of the room.  It's not a big change, but now the room looks more finished.  But, if you know me, you know the room is never finished, lol. 


Thursday, August 30, 2012

Family Fun


Family fun has edged out house projects the past few evenings, but don't worry, there are lots of good things on the way!!  For now, the hubs is oh-so-happy as tonight officially marked the beginning of college football season.

Tuesday, August 28, 2012

A Little Tweak

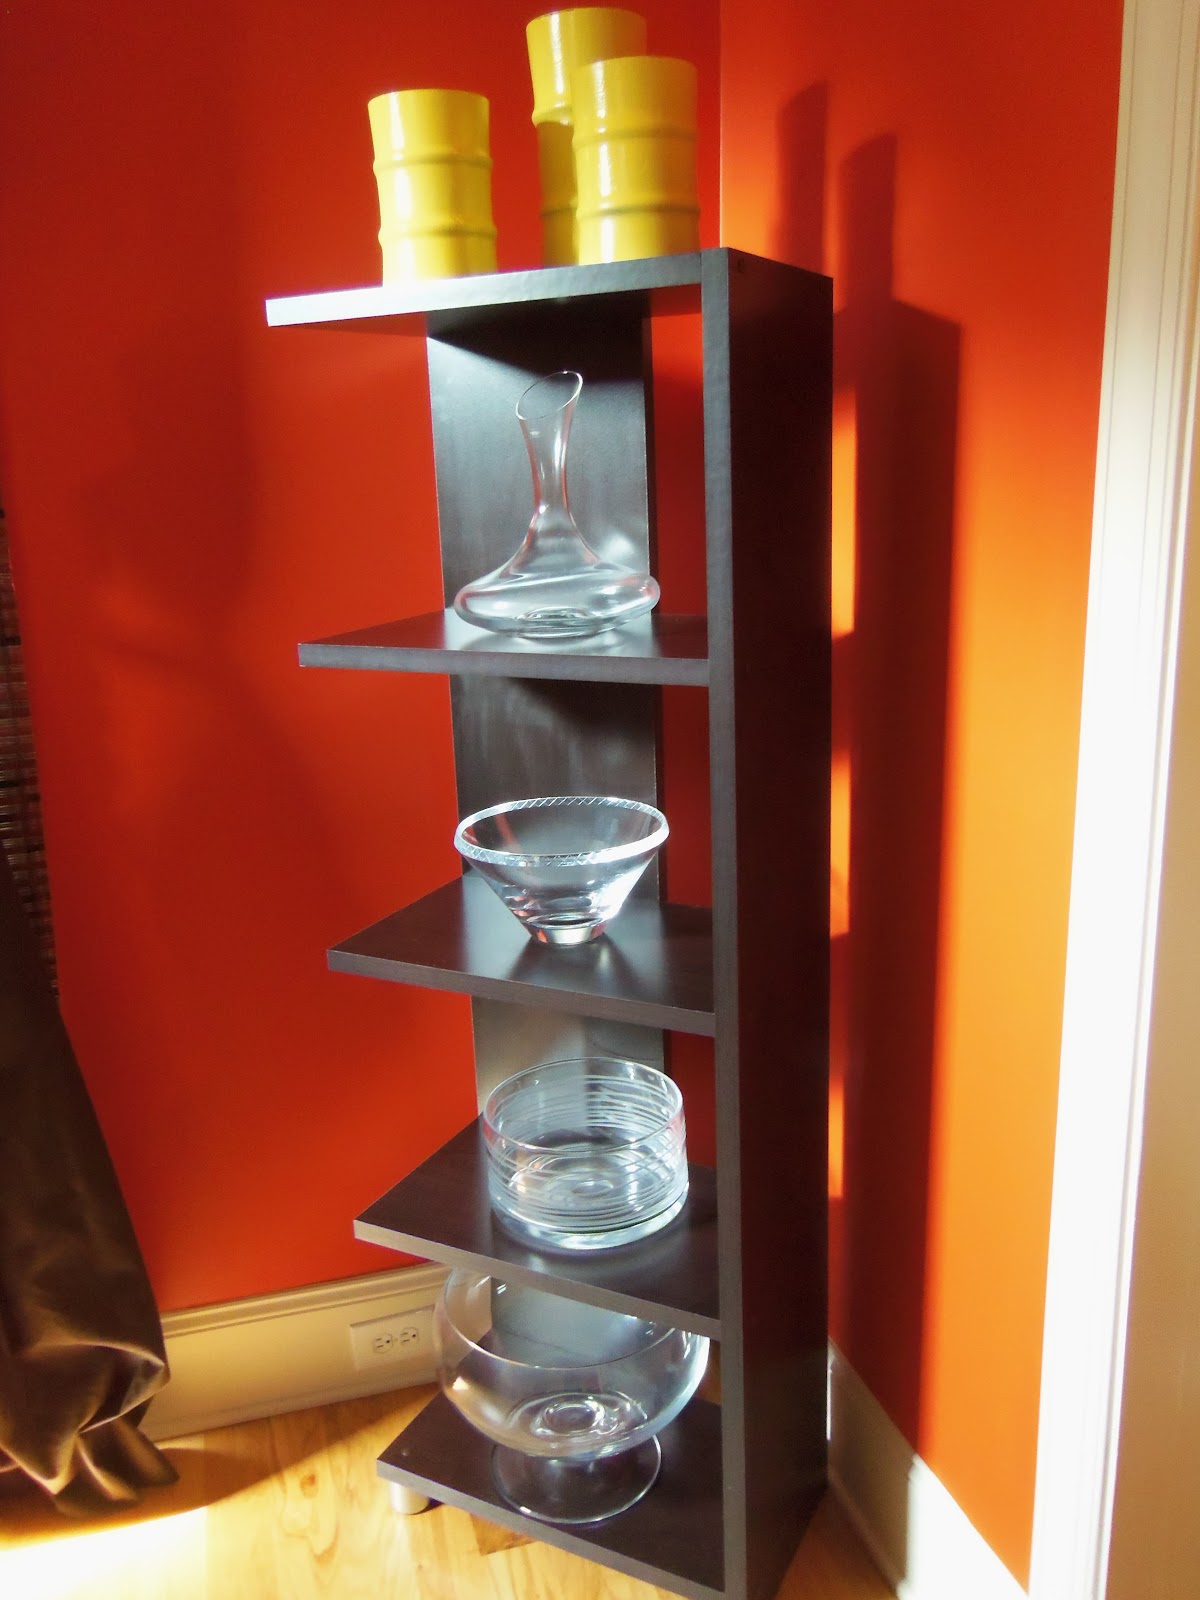
Yesterday I showed you the before & afters of the dining room.  But a little detail was bugging me.  These guys:
They were sitting atop the shelf with all the glass pieces:
I purchased them a while back from one of my favorite junk shops, and at the time they were a really dull rust color.  So I decided to brighten them up with some sunny yellow spray paint.  Which was a vast improvement!  But I've realized in living with them for a while now, they just don't jive with the rest of the house.  I looked around, and could only find 2 other bright yellow items in the house: a tray I spray-painted at the same time (lol!) and a cute round vase.

I'm starting to see that working within a somewhat limited color palette really makes our home feel cozy and cohesive, because each room can relate with the next.  Not that each room is the same, but certain colors run through out.  I love dark woods, browns, oranges, and teals.  So, teal it was!!
I applied a few coats of the same teal acrylic paint I used on a couple previous projects.  They looked better, but the paint is a matte finish, so I decided to also give them a few coats of spray gloss.  Perfect!!
I like it so much better, what do you think?

Monday, August 27, 2012

Before & After: Dining Room


Oh goodness, I can't believe I am even showing you that hot mess of a dining room!!  It was a disaster.  After we turned the office into a playroom, all the miscellaneous stuff that we couldn't find a home for landed on the dining room table.  Not to mention the table is also my crafting/project space, and a place where I take a bunch of blog pics!!!  But I kind of like that it looks so terrible, because it makes the after pics look even better!!!

We got to work last week painting the dining room in Daredevil, by Sherwin Williams.  I'm a HUGE fan of orange, it seems to pop up in most of the rooms in our house, and I love the idea of an orange dining room!  We actually painted a dining room in one of our previous homes orange, but I think I got the color much better this time!!  And let me just add a side note, I had narrowed the color down to a couple, and was favoring a darker shade called Cayenne.  My sister suggested I go with the slightly lighter Daredevil.  I am quite sure she will want credit for picking the perfect shade, so there ya go, Cris!!  :)

Without further ado, here is the after:
Another before:
And after:
Before (sorry for the poor light!):
And after:
Those elephant ears are from our garden, love them!!
Feeling like I need to change/edit the top of this little credenza, but for now here it is:
Not sure how long those glass pieces will be able to stay on this shelf with babygirl zipping around the house!  Oh, and I already made a little tweak over here, will be back tomorrow to show you that...


Overall, I am SOOOO pleased with the new color!!  It reads a tiny bit brighter in the photos than in person, but that could just be my monitor.  It's a really spicy & warm tone, and looks super crisp against the mouldings.

So, what do you think?