Oh goodness, where did the last week go?? Yeah, I don't know either! We have lots of catching up to do, but before that, here's a lil' somethin I've been up to...
I've been looking for a way to get better organized and keep track of upcoming dates & events. The hubs & I have a shared Google calendar which is on my laptop & phone, but I tend not to use it for the little things that babygirl & I are up to daily. I also wanted a place to plan out blog posts. I'd seen so many of the dry-erase picture frame calendars on Pinterest (like this or this) and I knew I wanted to do something similar, but on a LARGE scale. I've been keeping an eye out for large picture frames while out thrifting, and lookie what I found this past weekend (at G-Dub for $9.99)!!
Sorry the picture is at a weird angle- it's on my kitchen counter, aka workspace, cuz I could hardly wait to get started!! I instantly LOVED the bamboo-look frame:
But not really digging the gold. So I made quick work of taking the back off, removing the poster & glass...
And slapping on a (few) coats of my fave black paint.
At first I was thinking of using different background colors for each week, but then it felt like that might be too busy. So I decided to raid my fabric stash and see what I could find. Pattern would be fun, but might compete too much with whatever I am writing. So....I settled on this funky gold velvet croc print remnant I picked up ages ago. I decided to just "upholster" the original poster because it was a nice heavy cardboard. Here is the fabric laid underneath it:
I used black electrical/duct tape to secure the fabric...
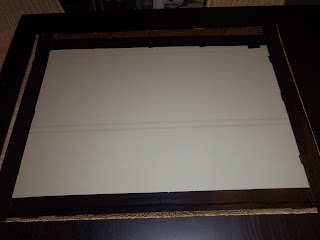
And here's my upholstered poster...
Instead of taping grid lines on the glass, I knew I wanted to use ribbon under the glass so I'd have a seamless surface to write on. So I tested a few colors of ribbon to see what I preferred. I decided to keep it nice & neutral with the cream ribbon.
Testing the whole look, and I'm LOVING it. Except I grabbed the MATTE black paint instead of glossy- oops! Easily remedied with a few light coats of clear gloss spray paint!!
This was THE MOST TIME-CONSUMING part of this project- measuring out the grid lines. Whew! If I'd thought it out, I'd have made the top, bottom & sides a tad bigger than the rest since they'll be partially covered by the frame. But that's called hindsight, and no way was I going to change everything once the thought came to me!!
I popped the glass back into the frame, and then the upholstered poster. Unfortunately quite a few of the little metal tabs that help to hold the goods into the frame had been lost, so I used the ones that were intact, and then placed another heavy cardboard that had been in the original picture behind my upholstered piece, and went a little nuts with the tape to make sure it was secure.
I moved the hanging brackets so I could hang the picture horizontally:
And here's the finished product!!
And after adding days, dates, etc. I'm going to have to play around with markers to find colorful ones that ALSO show up well, tho it IS actually much more visible in person!
But oh-my-goodness I couldn't be happier!! Now I just need to re-arrange the study and get a new desk in there so I can hang this baby and put it to use!!


No comments:
Post a Comment
I LOVE comments!! They make my day, so please don't be shy!!