
In honor of our second anniversary today, I thought I'd tell you all about how I DIYed most of our wedding!! It was a second wedding for both of us, and while we wanted a traditional wedding, we didn't want to go broke doing it. As much as I tried for a collaboration, the hubs just really wasn't into planning all the details of a wedding. He wanted to show up and have fun and build a giant bonfire (argh, men!!). So I dove head-first into the planning and consulted frequently with my bridesmaids on colors & flowers & all the little details and my brother, aka the rockstar chef, on all things food.
I was going for a rustic, chic, southern, modern, family-oriented affair that focused on great food, great family & friends, good music, dancing & fun. Simple, right??? LOL.
So let me set the scene...we got married at a friend's horse property, lovingly called The Barn. It's a gorgeous wooded spot in the middle of the city, and it couldn't have been more perfect. She already had so many of the fantastic rustic details, so we just played them up to the fullest. There were old wood benches that we used as seating during the ceremony, a simple low stage that our great neighbor built for us, a version of a chuppah we made on the spot out of PVC and draped in tulle for a focal point, and that was just the ceremony. Here, take a peek...

We did all the table decor, and used a combination of long family-style tables with the same benches used for the ceremony and round tables with wooden chairs. The tables were draped in white voile and then topped with burlap. We used moss in the centers along with mason jars filled with sand & white candles, tiny bud vases purchased at Big Lots with white & lime green spider mums, and rustic bird tealight holders (purchased at the Dollar Tree, of all places!!). The tables were set with white dinnerware we purchased in (major) bulk from Ikea, and we bundled the white linen napkins with a strip of burlap & ribbon and tucked sweet wooden utensils into them. For glassware we used a combo of mason jars strung with "shrinky-dinks" that doubled as place cards with each guests name & table number (we painted wooden signs for each table with table numbers) and a perfect way to make sure that no one lost track of their glass! We also purchased wine glasses in bulk (again, Ikea) and used those for the wine. We served wine from Trader Joe's (cheap & delish), Yeung-ling beer iced in giant galvinized tubs, and lemonade & sweet tea served from large drink servers we purchased (these have come in so handy, we use them at every party!!). Here's the eye-candy...


Around the site, we used more of the bud vases with spider mums and the bird votive holders. We also purchased clear glass tea light holders from Z Gallerie that we used on the rustic wooden high-top cocktail tables. There were so many cool details on site too, like these awesome chandeliers.


The round tubes you saw next to the tableware were our favors to the guests. In my family we grew up doing "Christmas Crackers" every year on Christmas Eve, and a few years back my sister & I started making our own crackers instead of buying them. We knew this would be an awesome favor!! If you're not familiar with crackers, they are just a cardboard tube covered in paper with a snapper hidden inside and tied on the ends. One person pulls on each end, a loud POP happens, the paper tears off the end, and gifts pour out!! We filled them with bags of ivory & lime green Sixlets, scratch-off lotto tickets, silly jokes and the obligatory paper crowns. We urged guests to wear them, and wore them ourselves which made for lots of cute pictures!!


I also took on the task of making the ring-bearer "pillows", all the boutonnieres for the men and the corsages & bouquets (and a special flowergirl headband) for all the gals. Whew, that was a LOT of work. I did a trial run months before and felt very confident in my abilities: overly-confident, I'd say! They were left to do the day-of, and that made for a very un-relaxing day. But I think they turned out alright! For the ring-bearer pillow I used a large moss-covered ball purchased from Michael's, added a stick "handle" and then tacked ivory ribbon to the top and tied it in a large bow. I stuck to a simple combo of lime green & white spider mums for my bouquet, the same mums and allium (I think that's what the spiky purple bud is!!) for the bridesmaid bouquets, lime green spider mums for the corsages & headband, lime green button mums, allium and assorted greenery for the boutonnieres, and an ivory rose with greenery for the hubs. (He broke his boutonniere within moments of putting it on, I almost killed him, lol!) Here are a few pics...


I saved the best for last- the FOOD!!! My brother (the chef) and I (the wanna-be chef) pored over the food for months. We talked about it for hours. And then, somehow, he along with his wife and a couple extra hands here and there, pulled off the most amazing wedding feast ever. I can't tell you how many people raved over the food, and I'm still trying to figure out how they did it!!
The Menu (as best we, and the photos, recall):
Apps- shrimp & grits, fried chicken drummettes & deviled eggs
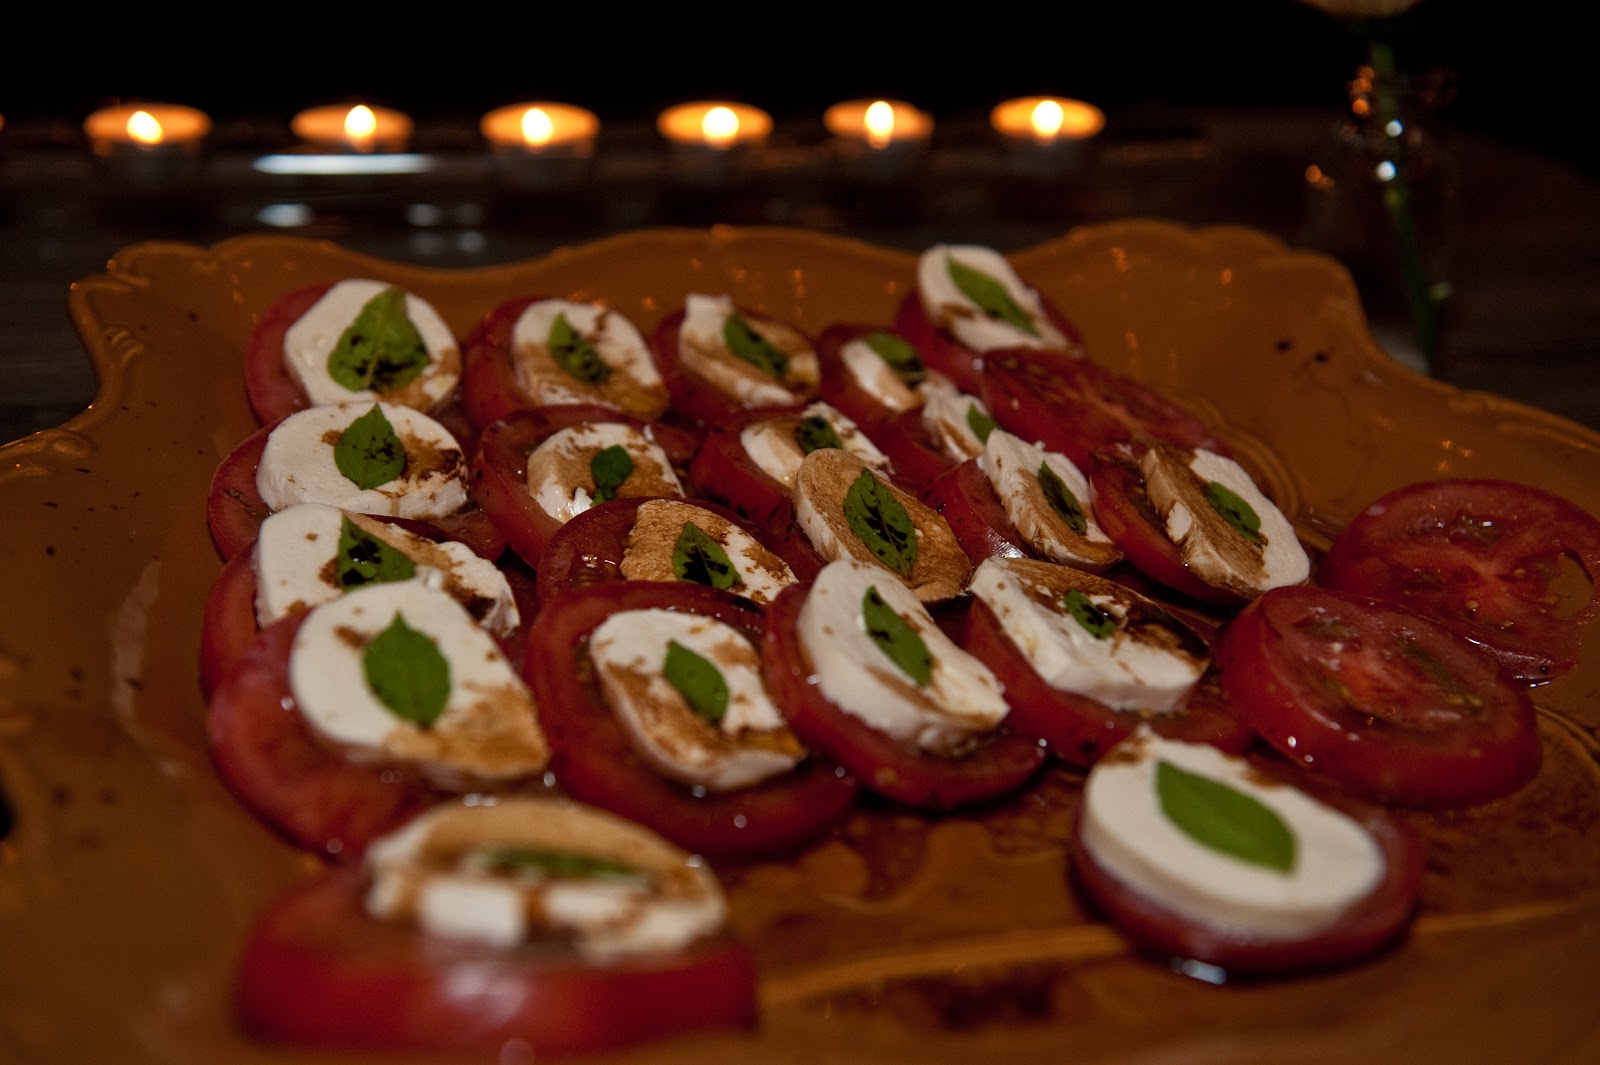
Salads- caprese salad (that mistakenly went out as an app, lol) & caesar salad
Mains: cornmeal & pecan crusted tilapia with a peach whiskey sauce, meatloaf with a brandy mushroom cream sauce & roasted pork tenderloin with an orange sage sauce
Sides: roasted corn on the cob, collard greens, mac & cheese and mashed potatoes
Desserts: red velvet & carrot cakes, pecan pie, flourless chocolate cake and a fruit & meringue cake
Feast your eyes...


So there you have it, October 16, 2010, one of the best days ever!!

No comments:
Post a Comment
I LOVE comments!! They make my day, so please don't be shy!!